Disclosure: WorkWise is reader-supported. When you buy through links on our site, we may earn an affiliate commission at no extra cost to you. Learn more.
The single biggest aesthetic upgrade you can make to a home office is hiding cables. Even a perfectly clean desk looks chaotic with a spaghetti pile of black cables snaking across the floor. The fix takes one afternoon, costs under $50, and once it's done you'll never have to think about it again.
The materials list
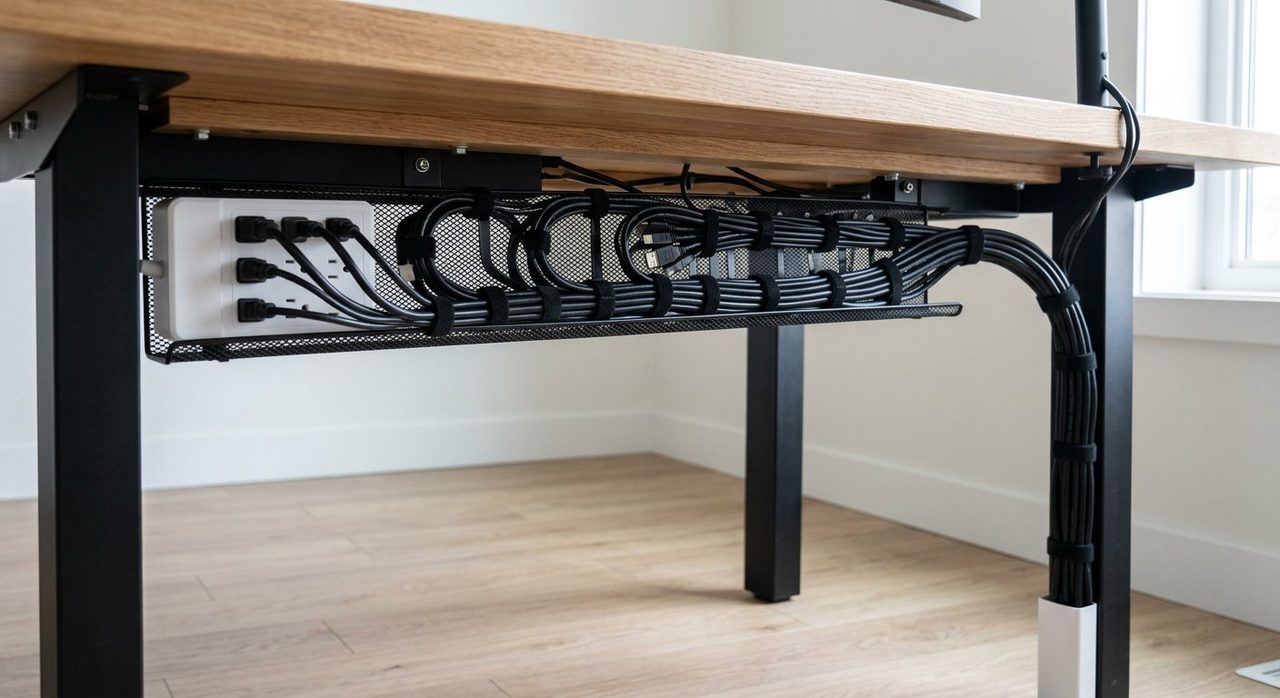
- Under-desk cable tray — the workhorse. Holds excess cable, hides the power strip, mounts to the underside of any desk.
- Velcro cable ties — reusable, gentle on cables, replaces all the random twist-ties in your drawer.
- Cable raceway (paintable) — for cables that run down a wall or desk leg.
- Adhesive cable clips — small clips that stick to the underside of the desk and hold individual cables in place.
- One quality surge-protected power strip — mounted under the desk, becomes the single source of power.
Total: about $45 on Amazon if you don't already have any of it.
Step 1: Unplug everything and take stock
Start by unplugging every cable and pulling them out from behind the desk. Yes, it's annoying. But trying to organize a tangle in place never works. Lay each cable flat, identify what it powers, and tag the unknown ones.
Step 2: Pick your "cable spine"
Almost every desk has one corner where most devices live. That's where your power strip will go. Mount the under-desk cable tray right under that corner. Every cable from above will descend into this tray.
Step 3: Mount the power strip
Velcro or screw the power strip to the underside of the desk (or the inside of the cable tray). Now every plug-in for the entire desk is in one accessible spot, but invisible from above.
J Channel Under-Desk Cable Tray
$25. Powder-coated steel, 17" long, holds a power strip plus excess cable. Mounts with included screws or 3M strips.
Check price on AmazonStep 4: Route cables down into the tray
Each device's cable should drop down behind the desk and into the tray. Use the velcro ties to bundle similar cables together (all the USB chargers in one bundle, all the monitor cables in another). Then route those bundles down through the back of the cable tray.
Step 5: Handle the cables that leave the desk
You'll have a few cables that go from the desk to the floor — typically the power strip's main cord, and maybe an Ethernet cable to a router on the floor. These are the most visible cables in any setup. Two options:
- Cable raceway down the wall — best if your desk is against a wall. The raceway is paintable.
- Cable wrap (split sleeve) — bundles multiple floor-running cables into one neutral tube.
Step 6: Use adhesive clips for stragglers
For individual cables that wander (the cable to a webcam clipped on top of the monitor, the desk lamp cord) — adhesive clips on the underside of the desk hold them flush and out of sight.
VELCRO Brand ONE-WRAP Ties (100 pack)
The good ones. Reusable, won't damage cable insulation. A lifetime supply for under $10.
Check price on AmazonD-Line Cable Raceway (Paintable)
For wall-running cables. Paint it to match your wall and it disappears.
Check price on AmazonStep 7: Consolidate with a USB-C hub
If your laptop has USB-C, a powered hub turns "one cable to my laptop" into "everything." Power, monitor, USB peripherals, SD card, and Ethernet all go to the hub, and a single cable runs from the hub to your laptop. This alone eliminates 5–6 cables you'd otherwise need to manage.
Pro tips that aren't obvious
- Leave slack at both ends of each cable. Cables under tension fail faster, and you'll regret not having extra length the next time you rearrange.
- Label both ends of any cable longer than 3 feet. A little washi tape with "monitor power" on each end saves you hours later.
- Group power and data separately when bundling. Running them tightly together can cause interference (especially with cheap cables).
- Don't enclose the power strip in a sealed box. Heat needs somewhere to go.
Final word
Cable management isn't optional for a serious home office. It's the difference between a workspace that looks intentional and one that constantly screams "rushed setup." The materials are cheap, the project is one afternoon, and once done you'll never have to think about it again. Combine this with the broader desk organization system and you have a workspace that actually feels good to sit at.
Frequently asked questions
What's the cheapest way to manage cables on a desk?
A pack of velcro cable ties ($5) and a single under-desk cable tray ($25) handles 90% of the visible mess. Mount the tray under the back edge of the desk, bundle the cables that come up from it with velcro, and route them along the desk underside.
Should I use zip ties or velcro for cables?
Velcro every time. Zip ties cut into cable insulation over time and have to be replaced when you change a setup. Velcro is reusable and gentler on cables.
How do I hide cables coming down from the desk to the floor?
A cable raceway (a hollow plastic channel that adheres to the wall or desk leg) is the cleanest solution. Cables enter the top, exit at the bottom, and the channel is paintable to match the wall.
Is it safe to mount a power strip under a desk?
Yes, with two caveats: use a surge-protected strip rated for the load, and don't enclose it in anything that traps heat. Most cable management trays have ventilation by design.
Spotted a mistake or want to suggest a product we should test? Get in touch — we read every message.