Disclosure: WorkWise is reader-supported. When you buy through links on our site, we may earn an affiliate commission at no extra cost to you. Learn more.
A standing desk is one of the highest-ROI upgrades you can make to a home office — but only if you actually use it the right way. Stand for ten hours straight and you'll feel worse than if you'd sat all day. Here is the setup we wish someone had given us when we bought our first standing desk three years ago.
Step 1: Get the desk height right
This is the single most overlooked thing. A standing desk that is even an inch too high or too low will quietly destroy your shoulders and wrists.
- Elbows at 90°, forearms parallel to the floor, when your hands rest on the keyboard.
- Monitor top at or just below eye level — that usually means putting it on a monitor arm or stand.
- Use a tape measure when standing in your normal shoes (or barefoot, but be consistent).
If the maths intimidates you, most standing desks have a programmable memory — set one for sitting and one for standing and you'll never have to think about it again.
Step 2: The 20-8-2 rule
This is the rule I wish someone had taped to my monitor when I first bought a standing desk. The "stand as much as possible" advice — which is everywhere online — is how you end up with sore feet, lower-back fatigue, and a desk that's permanently locked at sitting height after three weeks.
For every 30 minutes: 20 minutes sitting, 8 minutes standing, 2 minutes moving.
This ratio comes from ergonomics researcher Alan Hedge at Cornell, and in our experience it's the most realistic. The "stand as much as possible" advice you read online usually leads to people abandoning the desk altogether after two weeks of sore feet.
Step 3: Buy a real anti-fatigue mat
A standing desk without a mat is half a setup. Your knees, hips and lower back will thank you. Look for one that's at least 3/4" thick with a contoured surface — the cheap flat foam mats compress within a month.
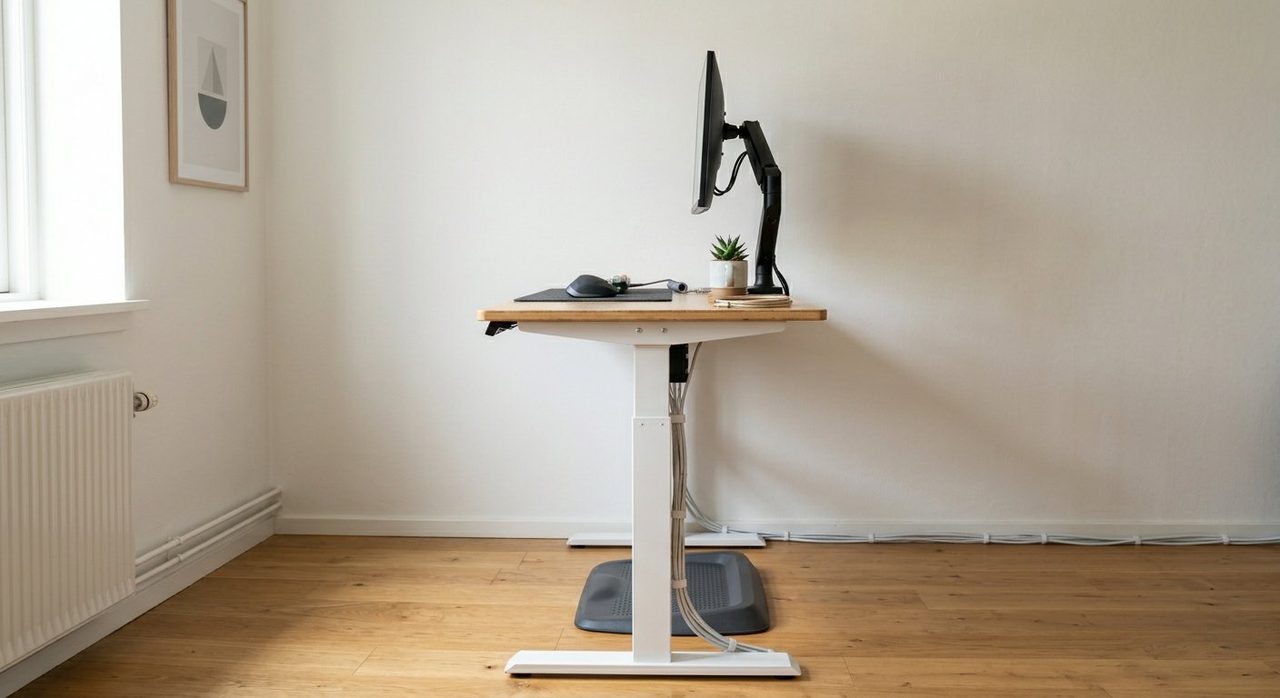
Step 4: Sort out your monitor
Whatever the height of your desk, your monitor needs to come up separately. A simple monitor arm gives you:
- Correct eye-line in both sitting and standing positions.
- Free desk space underneath.
- Easy adjustment when you switch tasks (writing vs video calls, for instance).
For most people, a single 27–32" monitor on an arm beats a dual-monitor setup. We dig into this in our monitor guide.
Step 5: Cable management is not optional
The day you raise your desk and rip the power cable out of the wall is the day you wish you'd done cable management. Three cheap tools fix this forever:
- A horizontal cable tray that bolts to the underside of the desk.
- Velcro cable ties (not zip ties — you'll need to reconfigure).
- A small power strip mounted under the desk so all cables travel together.
Step 6: Wear shoes (or proper indoor footwear)
Standing barefoot on a hard floor or in slippers is a fast track to plantar fasciitis. If you don't want to wear shoes at home, get a pair of supportive indoor clogs (Birkenstock Bostons, Crocs Bistros and similar are popular for a reason).
Step 7: Build in micro-movement
Standing still is barely better than sitting still. The "movement" part of standing-desk benefits comes from shifting weight, taking small steps, and breaking position. Cues we use:
- Stand for phone calls.
- Walk to the kettle between meetings.
- Set a discreet timer (or use the Pomodoro method) to break up long focus blocks.
Common mistakes
- Standing all day, day one. Build up over 2–3 weeks; ramp by 10–15 minutes a day.
- Putting the keyboard on top of the desk. Use a tray or get the height exactly right.
- Locking the knees. Soften the knee joint — never hyper-extend.
- Skipping the mat. Always worth it.
Recommended starter kit
FlexiSpot E7 Pro Standing Desk Frame
Dual motors, quiet, programmable memory, supports up to 355 lbs. Pair it with a 60"x30" bamboo or solid-wood top.
Check price on AmazonTopo Comfort Mat Standard
The contoured "calf-stretch" design genuinely helps. Easy to clean, lasts for years.
Check price on AmazonHUANUO Single Monitor Arm
Easy installation, gas-spring, fits most 17–32" monitors. The same build as arms costing twice as much.
Check price on AmazonWrap up
Get the height right, get a mat, get a monitor arm, and ease into standing. Do that and a standing desk will pay you back in posture and energy for years. Skip those four steps and you'll join the long list of people whose adjustable desk is now permanently stuck at sitting height.
Frequently asked questions
How long should you stand at a standing desk each day?
Most ergonomics research supports the 20-8-2 rule: every 30 minutes, sit for 20 minutes, stand for 8, move for 2. That ratio gives most of the benefits without the foot/back fatigue of standing all day.
Do I need an anti-fatigue mat for a standing desk?
Yes. Standing barefoot on a hard floor for hours causes plantar fasciitis, knee pain, and lower-back strain. A good contoured anti-fatigue mat is the second-best purchase after the desk itself.
What's the right height for a standing desk?
Your elbows should be at a 90° angle with forearms parallel to the floor when your hands rest on the keyboard. Use a tape measure standing in your normal shoes; most adults end up between 38" and 47".
Should the monitor go up when the desk goes up?
Yes — the monitor must stay at eye level in both sitting and standing positions. The best solution is a monitor arm so it moves with the desk; otherwise you need a riser that elevates it.
Can I use a standing desk all day instead of sitting?
Not advisable. Pure standing causes leg fatigue, lower-back pain, and vein problems. The benefit comes from alternating between positions — not from picking one to do for 8 hours.
Spotted a mistake or want to suggest a product we should test? Get in touch — we read every message.